In the early 1800’s, women had several projects they would do. Back then though, these projects were more like hard work rather than fun. They did not have the resources we use today. Some of their homes didn’t even have windows to provide sunlight. Now, we flip a switch.
Every year the Pioneers had an annual “Autumn Slaughter”. They slaughtered 400 cows, sheep and pigs. They would use the fat from the animals, also known as “Tallow”, to make candles. That would supply them with enough animal fat/tallow for a year’s worth of candles.
The women would work all day making candles after the annual slaughter.
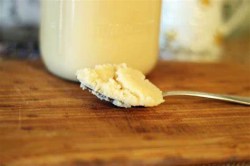
They would take cotton & linen, cut them up and twist them to make that wicks for the candles. The wicks were hand dipped over & over repeatedly. Then allowed to dry until a taper of sufficient size was made. Those candles required constant trimming — up to 40 times per night — and the smell could choke you. Beeswax produced excellent, fragrant candles, but it was hard to obtain; the candles were generally reserved for wealthy people and church clerics. Pioneer women in America discovered that the wax of native bayberry plants made a pleasant smelling candle, but it took a lot of bayberry leaves and labor to produce a few candles. Those clever, and overworked, women also invented a bar — called a broach — to hold several wicks at once so multiple tapers could be dipped in lard or tallow at one time and set to harden while another broach was dipped
Modern days, we have it so much easier! Buy the wax and melt it to make a basic candle.
There is a lot of history in candle making.
Today’s post is all about candle making.
Before I begin, here’s a few tips–
*To save money, you can use aluminum foil to cut up and hold the wick in place in the candle. Instead of buying the bottoms.
*You can reuse glass jars for the candles.
*You can add-in a variety of things. Dried flowers, glitter, you can use regular food coloring for the color. You can save the leftover ends of wax from previous candles and use that.
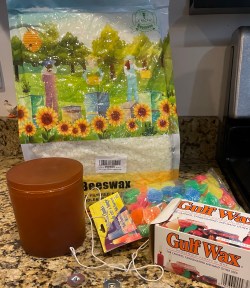
Supplies needed:
Wax – I used Gulf Wax. You can find it in the baking section at grocery stores OR there are also different waxes you can find at the hobby/craft stores like hobby Lobby or Michael’s.
Double boiler or a medium size pot for the water and a small pot to sit inside that pot for the wax to melt in.
A jar
Wick
The metal bottoms for the wick or aluminum foil – cut a little square, make a slit in it. Stick the end of the wick in that and fold the foil a little to keep the wick in place.
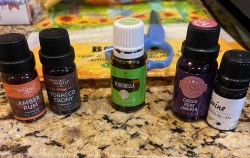
Scents– essential oils, if your using old wax that has smell you can use that. Things from nature like flowers such as lavender or pine tar, peppermint, sage, cinnamon, oats, coffee, eucalyptus.
Optional:
Food coloring
There’s also bags of colored wax chunks at the craft stores.
Step 1:
Put just enough water in the bigger pot so when the bottom pot goes in, it just touches the bottom of the small pot, maybe a little more.
Step 2:
Add the wax to the small pot and put that pot onto/in the other pot with the water. depending on the size of the jar you are using will depend on the amount of wax to melt. Use your best judgement.
Turn the flame on Medium to low setting. It took about 5-7 minutes for my wax to melt.
Step 3;
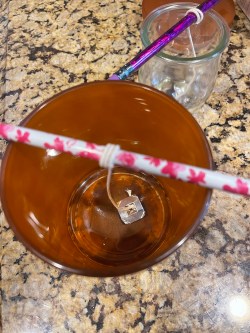
Cut up your wick to be about an inch higher than the jar you are using. Attach the wick to the metal piece.
You can wrap the top of the wick to a pencil and sit that on top of the jar so it holds in place.
Step 4:
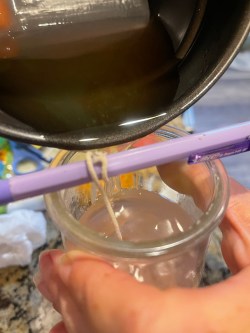
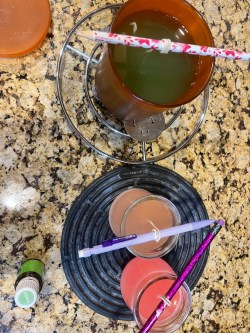
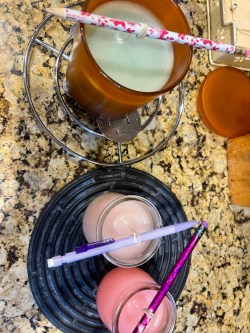
Once the wax is melted you can add your coloring. I used colored wax pieces. If you are making one candle, then you can add your scent at this time.

For myself, I made 3 candles. I put the smells in after I poured the melted wax into the jars. Mixed it with a little stirrer. You could also use a popsicle stick.
Step 5:
When the candle starts to harden, the very middle of the candle will sink a little. You can either melt a little bit more wax and add it on there while the wax is still soft OR leave it. Since I’m making this for my home, I choose to leave it. 👇 See picture.
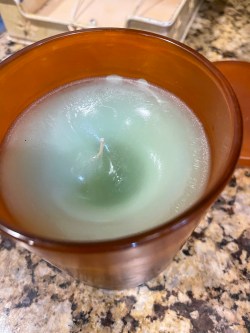
This is what they looked like about 45 minutes later.
Once the candle is 100% dry, you can cut the wick so there’s approx 1/2-1” on the candle .

Enjoy your new candles!

Leave a reply to Nisha303 Cancel reply