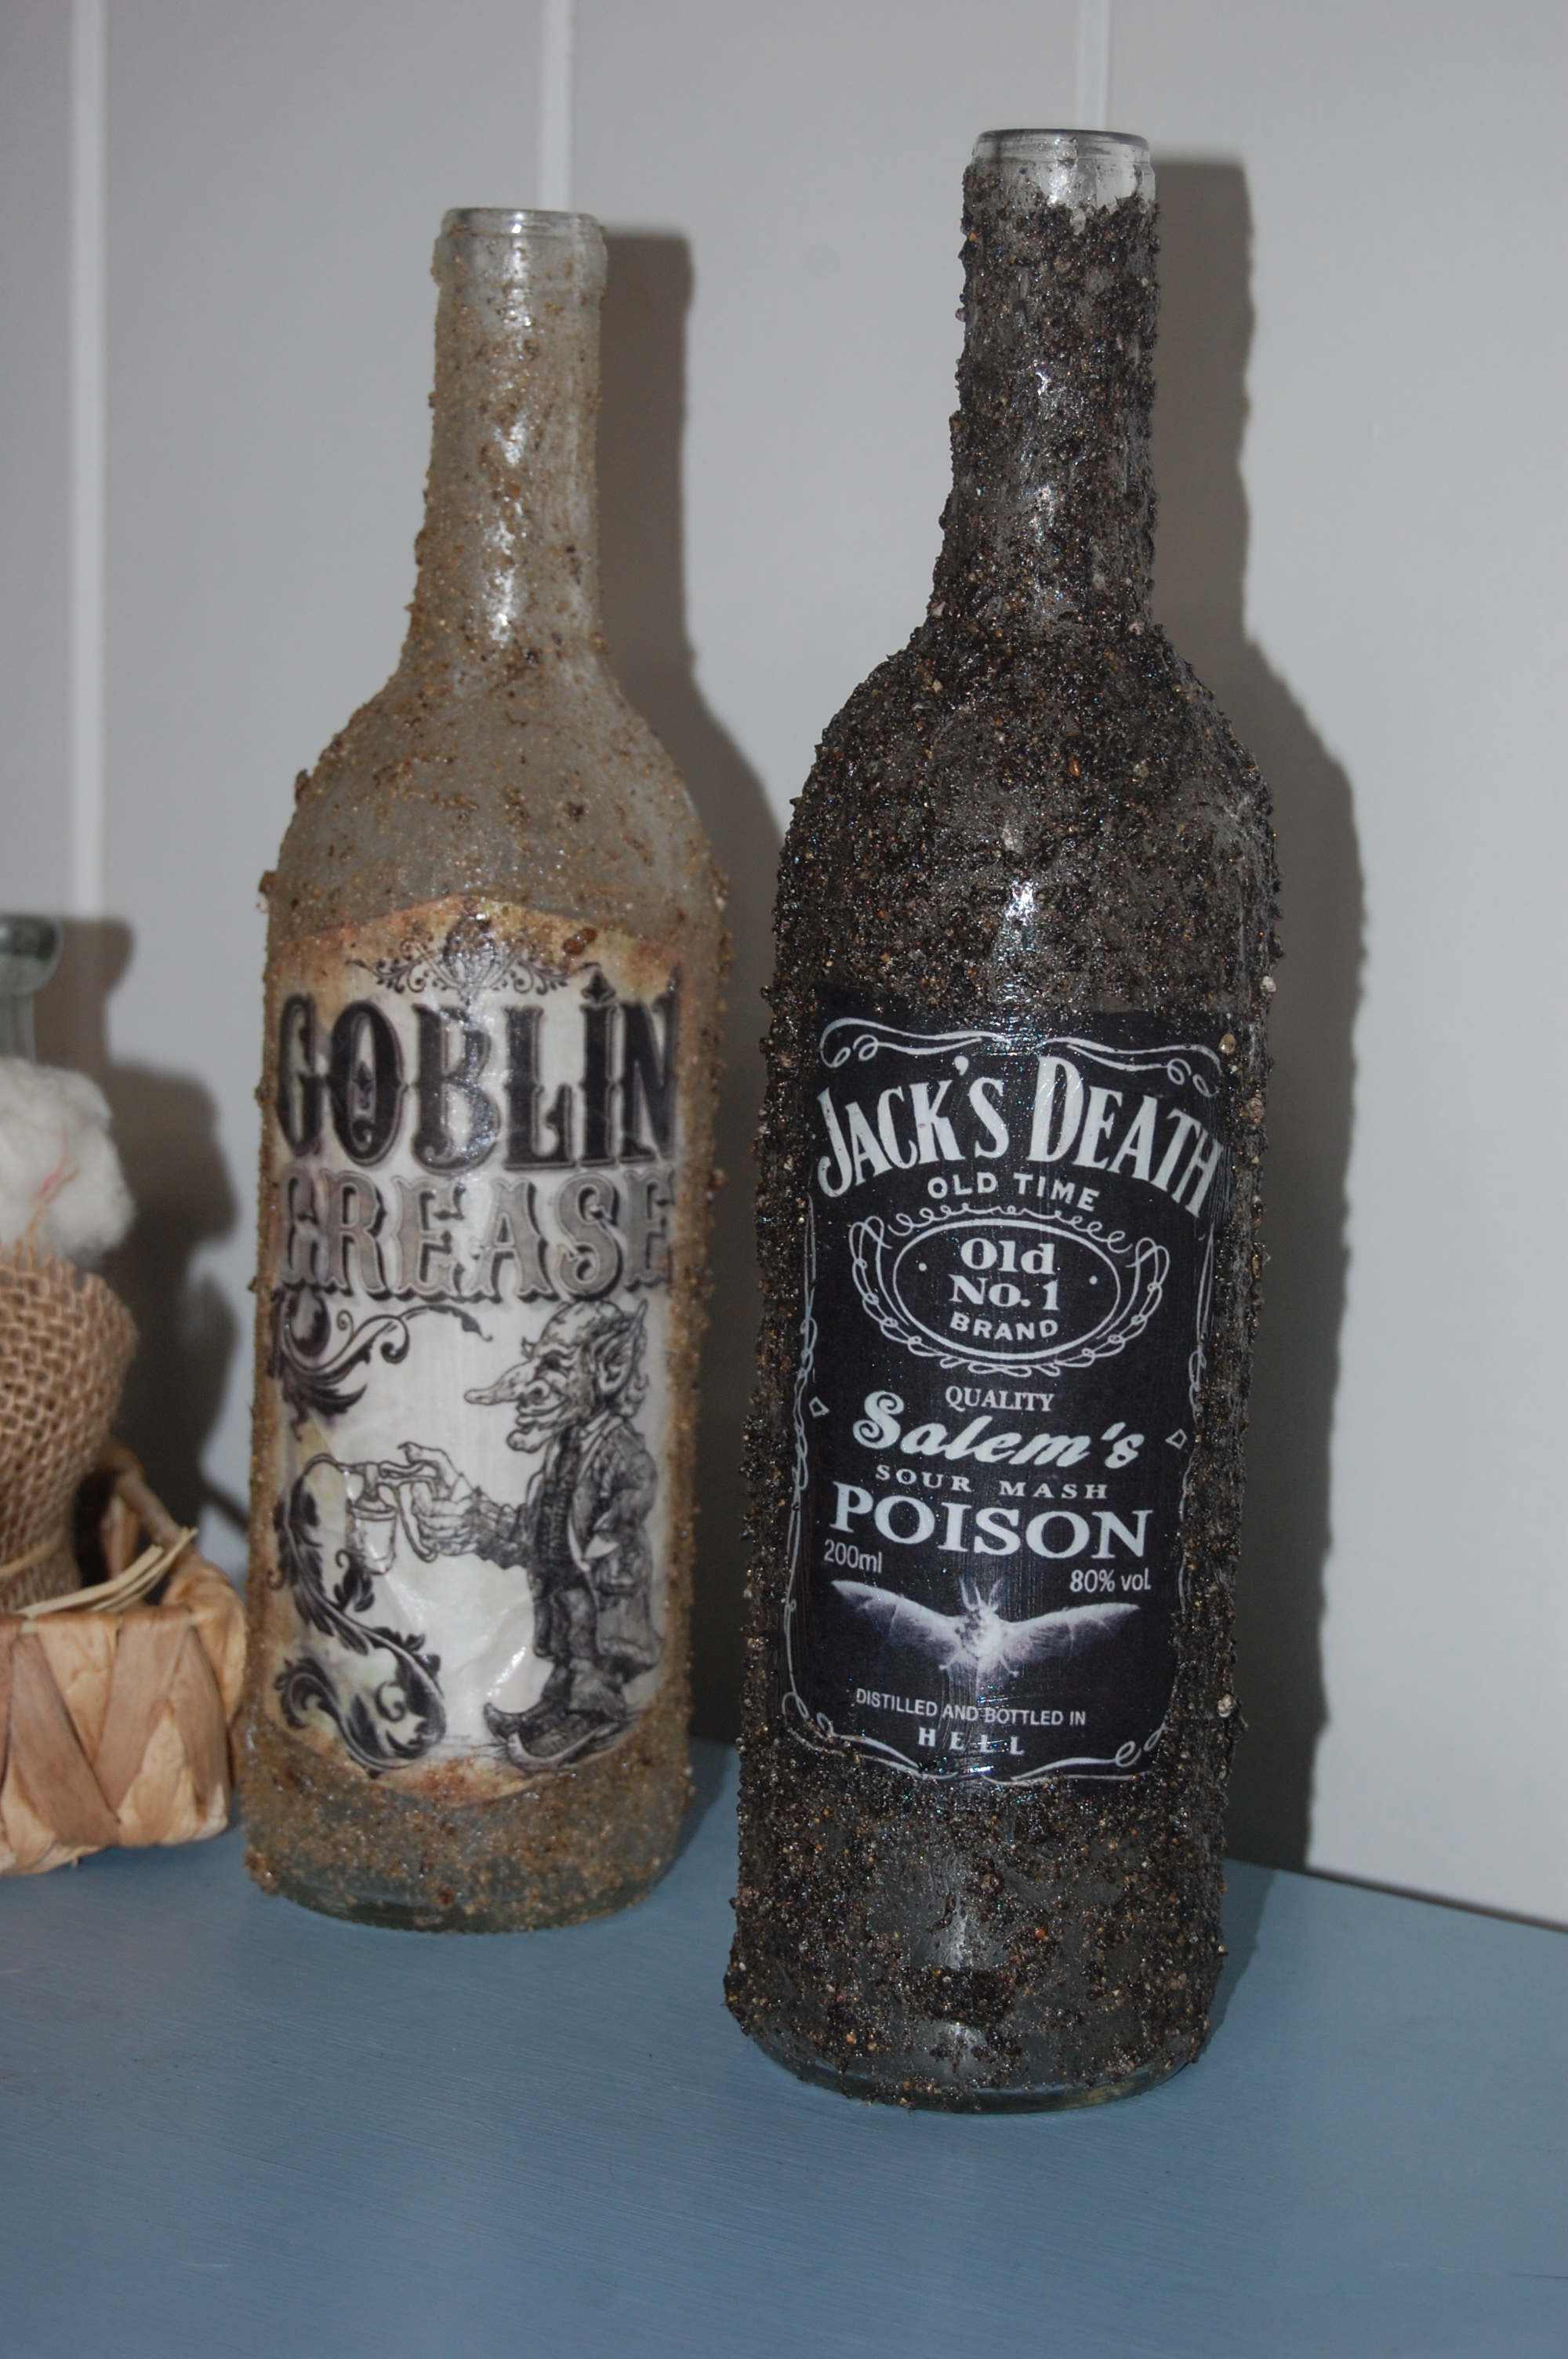
Hi everyone. I saved quite a few bottles to use in my kiln. Since I can not use my kiln at the moment I thought I would repurpose a couple to use for Halloween décor.
It’s super easy to make & fun. About a month ago I made this one-

The one we are making today, I think looks cooler! I provided a link right under the supplies for Halloween Images you can use if you’d like. Let’s create!
Affiliate link disclosure
This post contains affiliate links. If you click on the link and purchase the item, I may get a commission at no extra cost to you. All recommended products are based off of my positive experience with them.
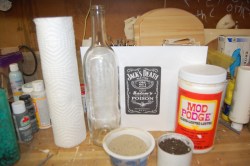
Supplies:
- A clear glass wine bottle
- Mod Podge-
- Sand – approx. 1/4-1/2 cup
- dirt – approx. 1/2 cup
- container to mix in
- Disposable gloves (if you don’t want to get your hands dirty)
- Something to stir with
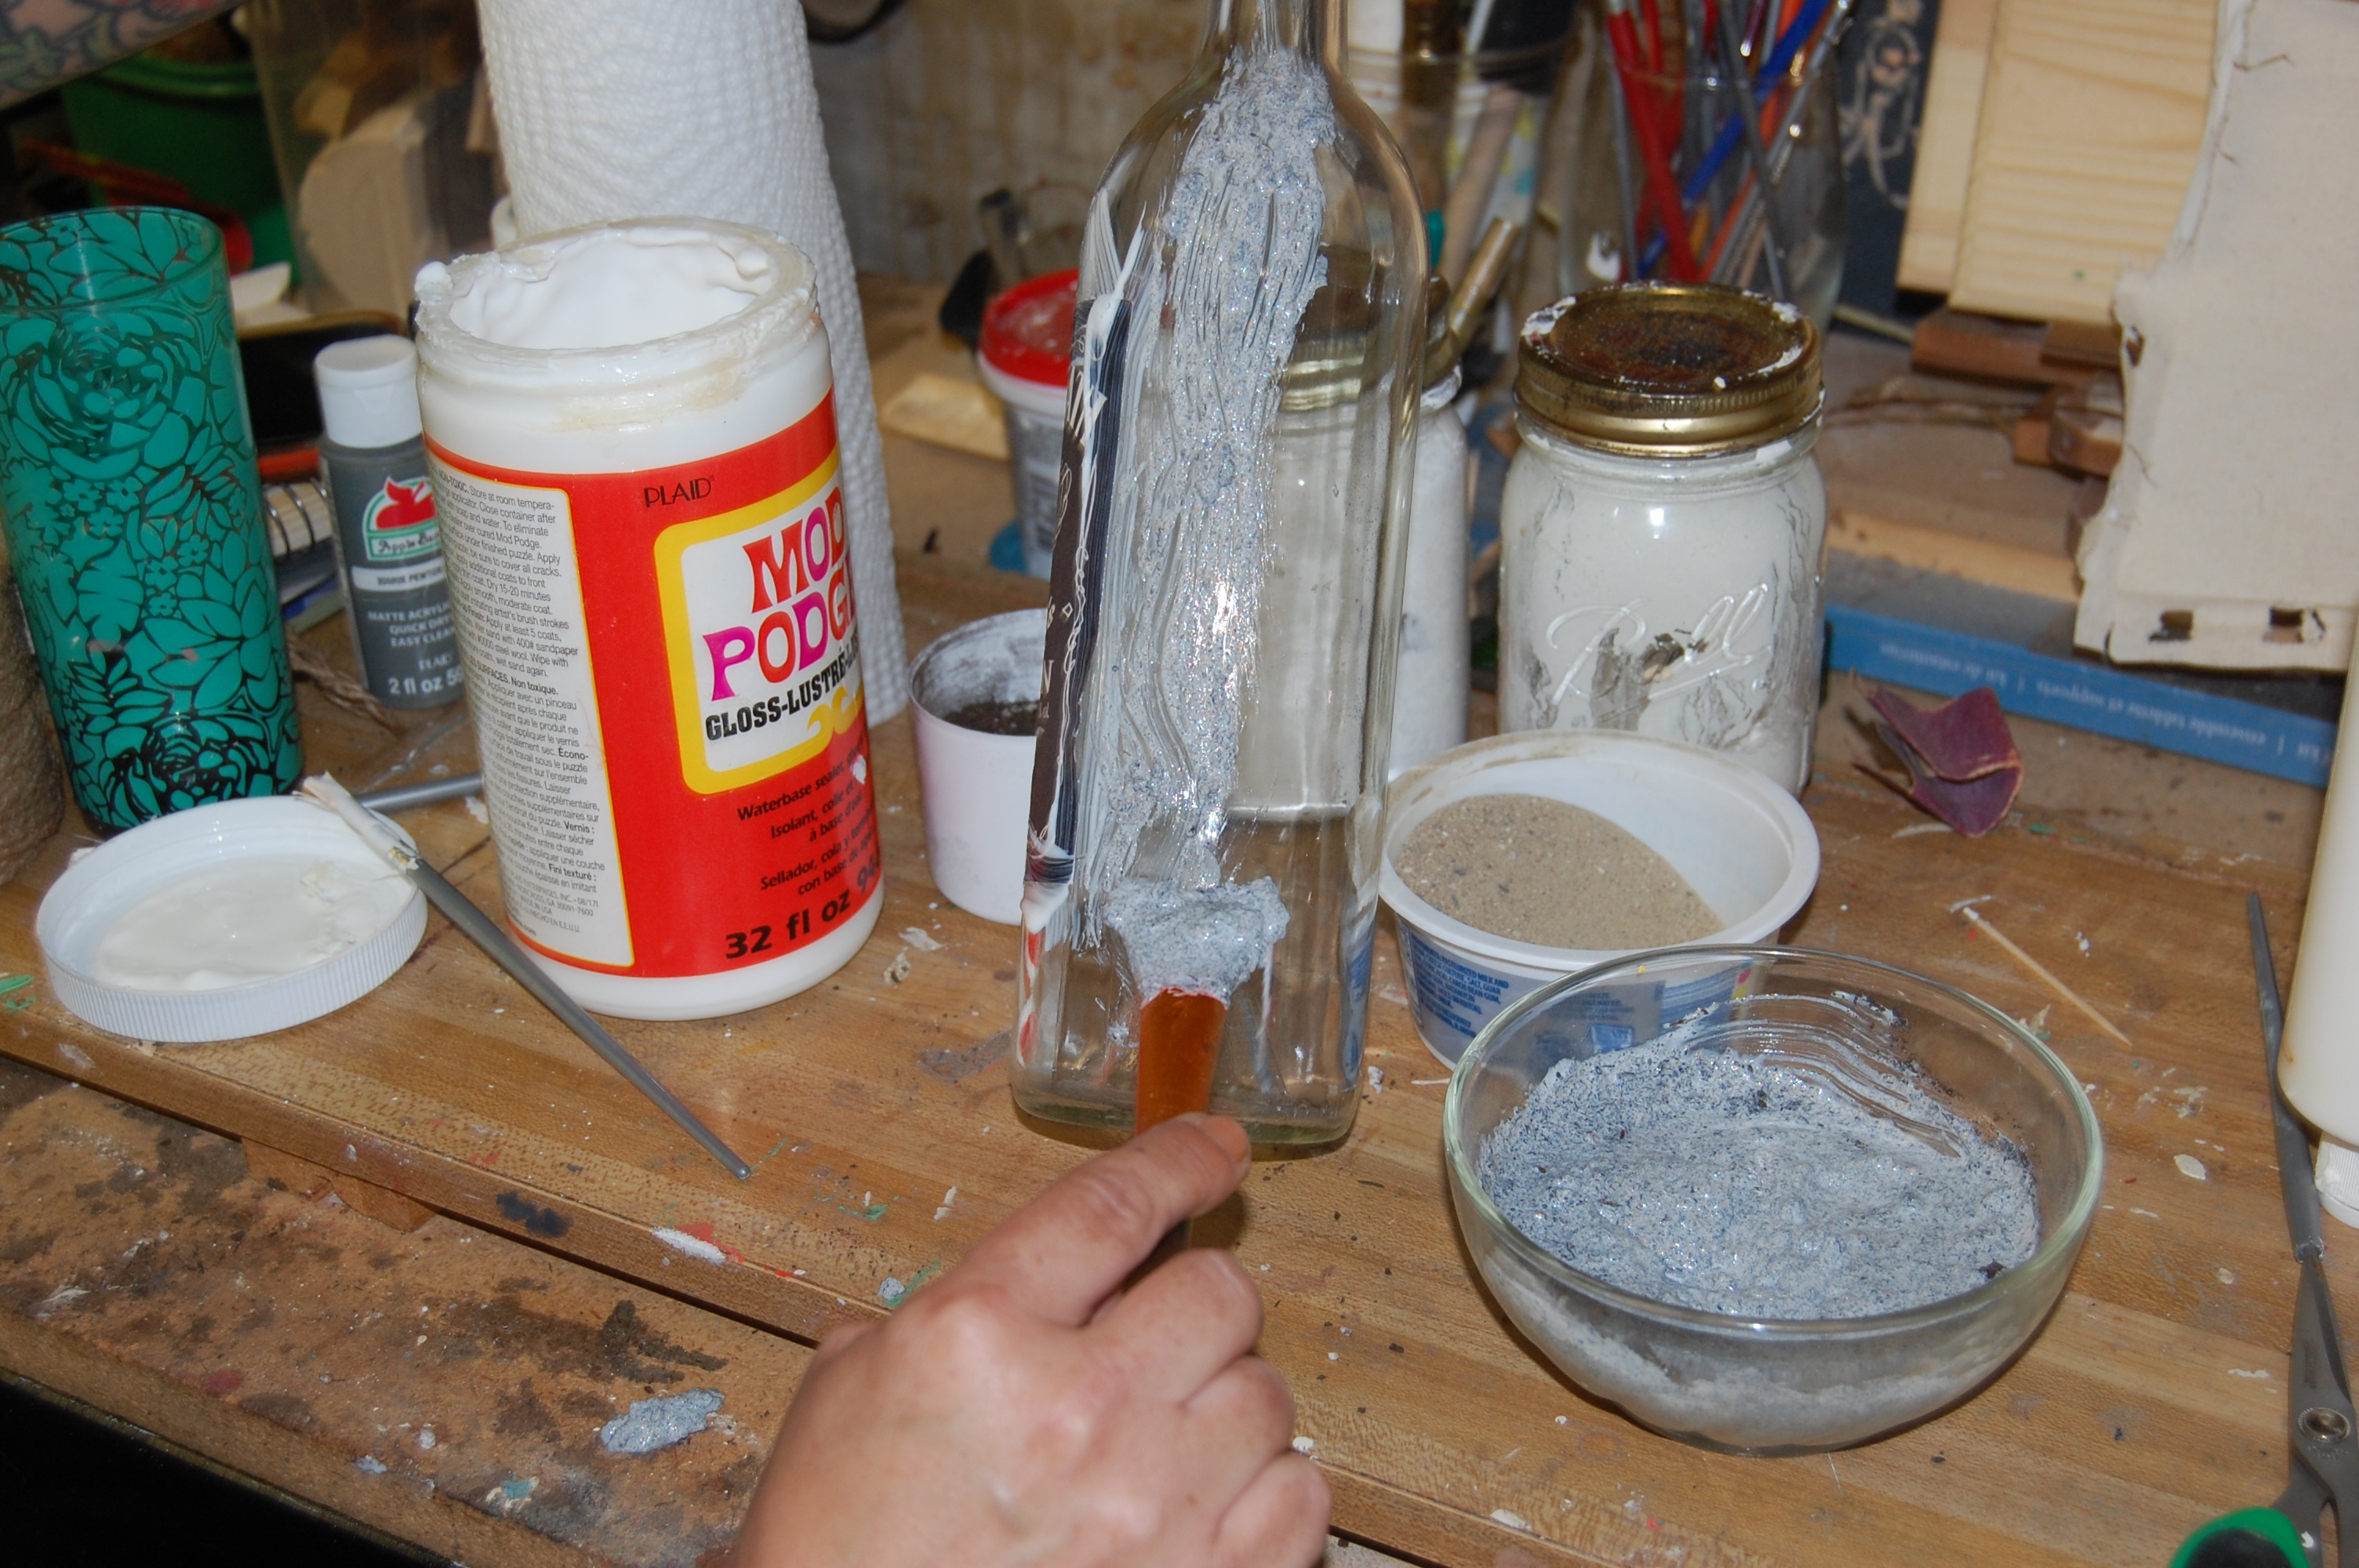
- Paint brush ( I used a silicone brush)
- Picture for the bottle.
I have attached a link to images you can use for labels on your bottle.
Step 1
Make sure to remove all old labels off the bottle first. Hot soap & water or Acetone works also.
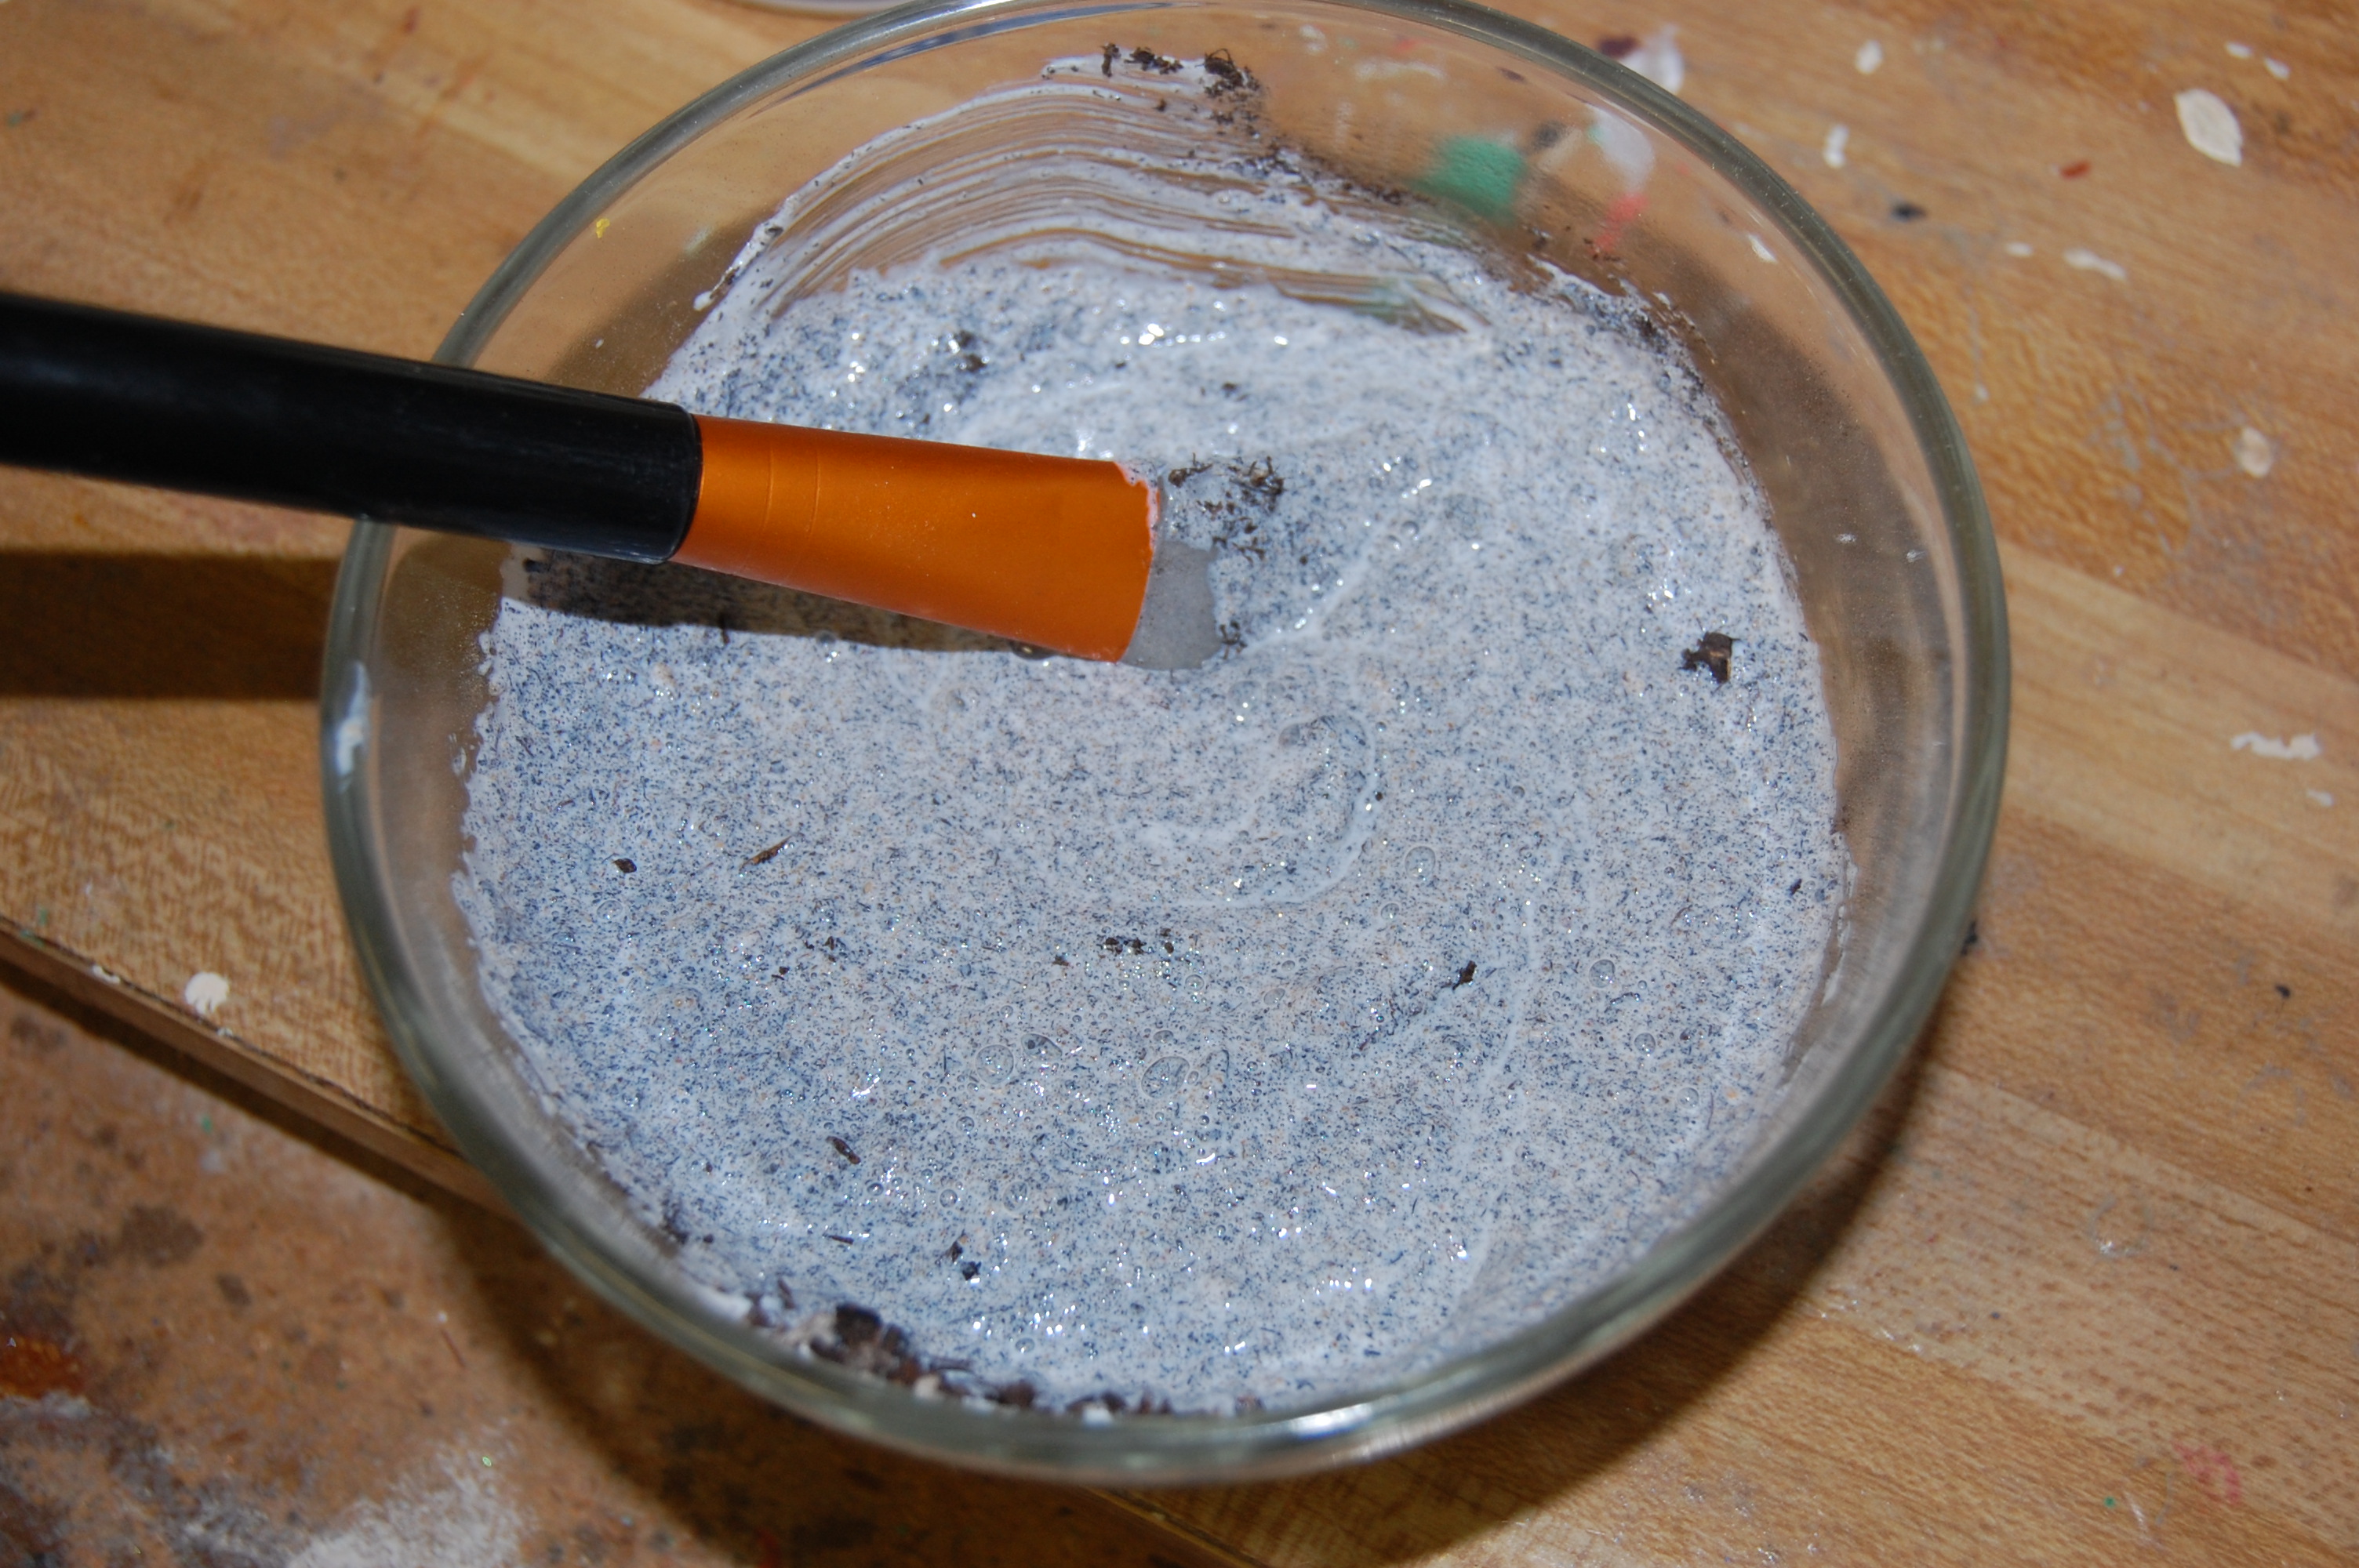
Start by pouring about 1/2 cup of Mod Podge into the container. Then add the sand & the dirt. I added more dirt than sand to give it the black color. The other bottle in the picture I made with more sand a less then 1/4 cup of dirt. So it depends on the look you are going for. Mix well


Step 2
Figure out where on the bottle you want the image. Apply plain Mod Podge on the area where the image will go. Then put the image on, being careful of wrinkles. Once the picture is on, apply another layer of Mod Podge on the image.

Step 3
I used a silicone brush to apply the mixture onto the bottle. It held up really well & was a lot easier to put on vs a foam brush or paint brush. It didn’t drip off. Use whatever works for you. I started along the outer part of the picture and worked around from there. Once you have the bottle coated, you can clean up any area you are not happy with or if some dripped.
Let dry. It took at least 2 hours to dry. If it’s warmer out, I’m sure it’ll dry quicker.
Repeat step 3 if needed. That’s it!
I think these would even look cool with the mini battery operated lights in them!