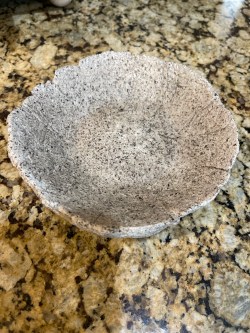
Hi everyone! It took a couple days for the coffee clay projects to dry. After they were dry, I put a coat of mod podge on them. Other than a couple tiny cracks and the edge of the bowl isn’t exactly perfect, they turned out great!!! See below at the end of the post for updated pictures.
Hi everyone. Hope your guys week is going well.
I am a big coffee lover. Always have been. Me being me and trying to find a use for things, I wanted to know what else I can use coffee grounds for. Besides putting in the garden or using them in fire starters. I found an article online on “coffee clay”. Yep, you read that right, coffee clay.

We’ve been saving our used coffee grounds for a while now. We usually use them on plants. Plus there’s another project I need them for that I’ll be doing a post on soon.
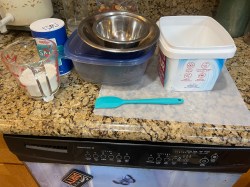
Supplies needed:
- 1 cup Used coffee grounds
- 1 cup flour
- 1/2 cup water
- 1/2 cup salt
- Bowl or container to mix it in.
- Spoon
- Something to use as a mold – I used metal bowls .
- Plastic wrap
- Rolling pin
- Placemat or something equivalent to cover your work area AND roll out the clay on
** you will want your coffee grounds dry for this project. I dried mine in the toaster oven at 275 degrees for 30 minute increments. Mixing it at the halfway point and when the 30 minutes is over. It took altogether about 1 1/2 hrs to dry 1 cup of grounds. **
Step 1:
In your bowl or container, add the dry ingredients. Coffee grounds, salt and flour. Mix well

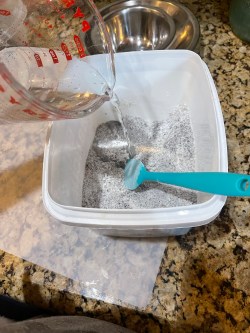
Step 2:
Slowly, a little at a time add the water and mix.
You want the clay to be almost like a play dough texture.
Tips:
~if it’s still sticky add a little more flour.
~if it’s dry, then add a little more water.
I ended up needing to add in about 1-2 Tablespoons more of flour.
Step 3:
Take the coffee clay out of the bowl/container and knead it with your hands on the placemat. I divided my coffee clay in two sections. Rolled out one section.

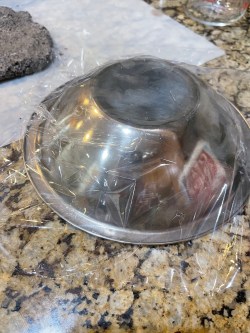
If you’re making a bowl, then turn the bowl upside down and cover it with plastic wrap. Then take your clay and put it on top of that. Form it so it’s as even as you can get it all the way around.
Please be careful not to make the clay too thin when rolling it out! If the clay is too thin, it will crack and brake apart when it’s dried.
*After I had my clay formed on the bowl and I made sure it was as even as I could get it all the way around, if I saw a section that was too thin, I’d add a little more clay to that section. Push and rub it in so you don’t see the marks from adding the little piece of clay.
If you divided your clay in two, now you can repeat the steps and make another bowl or make something else. Your choice.
Set them aside to dry.
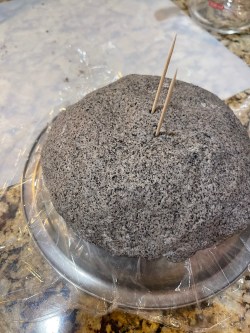
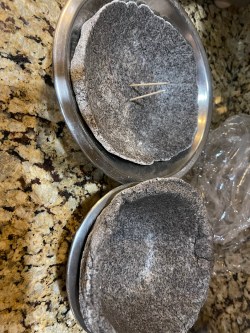
On one of mine I plan on turning it into a planter if possible, so I inserted 2 toothpicks in the bottom of it and kept them there so the holes don’t close.
After 2 1/2 hrs it looked like this, almost dry on the outside.

After 4 hours I flipped it over and took the plastic wrap off. Turned the bowl over and put the clay bowl inside the metal bowl I’m using as a mold. Now it’s time to let the inside dry. see picture below.
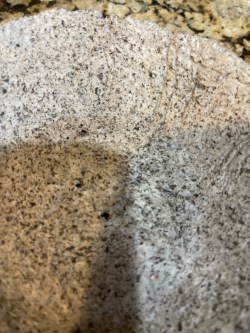
As of this morning, they were still a bit wet. So…they take a long time to dry.

I think I’ll figure out how to add a binding agent in there, like PVA glue or something, and make this again. It’s turning out good, seems a bit fragile.
I’d love to see what you guys made! Feel free to send me an email
*UPDATE*
The clay is not as fragile as I thought it would be.
In the photo below you’ll see I added two small drain holes.

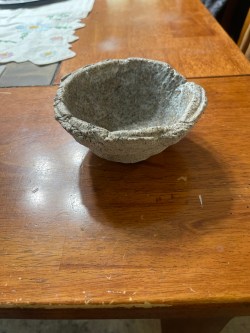
All in all it took 3 days to dry. Including putting a sealer on it.

Leave a comment