
The Dollar Tree. One of the best stores! It is somewhat of a crafters dream in there. You can find a lot in there like- wood , tissue paper, little macrame kits, paint, rub on transfers, holiday decor, gardening tools and supplies, the list goes on.
Going on Pinterest all the time I see quite a few neat ideas! If you can’t afford to buy things like decorations to dress up your home, then the next best thing…. Try to make it yourself. Don’t get me wrong, I have tried to make some things from ideas I’ve seen on Pinterest and let’s just say… I threw the ones that didn’t turn out away and salvaged what I could from them.
Now a days with the price of things rising it’s a good idea to try and be frugal. total out of pocket cost for this project was $3.75. Everything else I already had.
Today, I’m going to show you a super easy project. Decorative trays on a stand.

Supplies needed:
*Unfinished wooden tray
*Tapered candle holders
*Paper towels or a rag
*Foam brushes or a paint brush
*Glue of your choice — I used multipurpose cement glue, bought it at the dollar store for $1.25. In my opinion this glue is better than super glue.

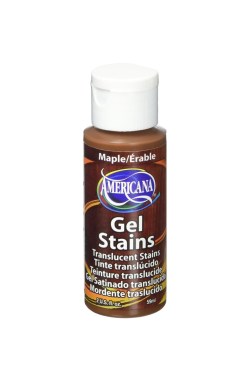
*Wood stain or paint or you can even leave the wood its natural color
I bought my stain on Amazon for $5.99
Optional:
*Shelf liner – again, I got this at the dollar store. (In the craft aisle) This one came in a roll.
*Ruler
*Pencil
Step 1:
After lightly sanding the wood tray and wiping it down, you will paint or stain your piece if you wish to do so.
Make sure you cover your work surface.
Step 2:
If you decided to stain your piece just follow the directions on the bottle. With a foam brush I applied some stain on the wood tray and then quickly wiped it off. Repeat until everything is stained.
Step 3:
After the tray is dry, I opted to cut some shelf liner and stuck it on the inside to dry. Then took it outside and sprayed a varnish on it. I used Krylon – Kamar Varnish. (You can find it on Amazon for $7.28 ). You can use polyurethane, varnish matte or glossy, polycrylic, Mod Podge. Let dry. I left it to dry for approx 5 hrs. Give or take. It was sticky on the shelf liner on the inside bottom of the tray so I let mine dry longer.
Let it dry. Mine dried pretty quick but I still waited about 2-3 hours for the stain to dry. (If you purchase the stain I did, it literally goes on like paint but once it gets wiped off, it looks exactly like a regular wood stain.

Step 4:
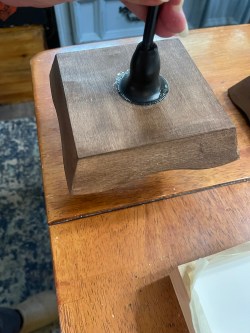
Once the tray is dried, turn it upside down on a clean surface. With your ruler measure the bottom of the tray to find the middle and mark it with a pencil. My trays are 5×5.

Now take your tapered candle holder and on the top where you would normally put the candle in, you are going to put glue around the rim of the candle holder. Turn it upside down and put it on the bottom of the wooden tray where you marked the middle at. Then I put more glue where the top of the candle holder meets the wood. Just to make sure it’s secure.
Let the glue dry for a while. I let mine dry for about 30 minutes just to be safe.
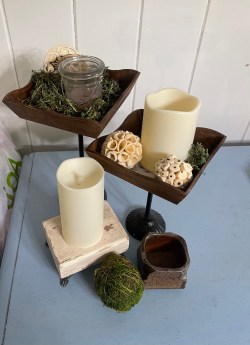
Now to decorate with your new decor!

Total cost of project– $3.75
Total time- 6-7 hours including dry time.


Leave a comment