Good morning! I’m all for repurposing things or turning something outdated and ugly to something pretty and resourceful.
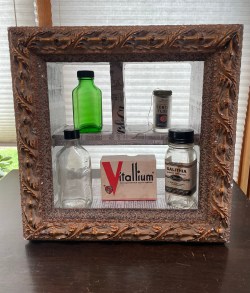
I had to do a challenge for a company I work for. Last week’s challenge was to repurpose something around your house into home decor. I choose a picture frame. I love how it turned out!
I apologize, I did not put in steps for cutting the wood.
Supplies needed:
Wood– cut to the size you need you will want it a little smaller then the frame.
Sander
Rag
Spray bottle with water
Stain or paint
Paint brush or foam brush
Picture frame
Disposable gloves
Nail gun
Wood glue

Optional:
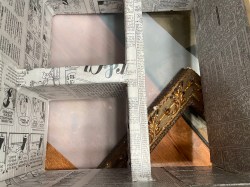
- I decoupaged the inside of the box shelf. If you’d like to do that you’ll need –
- Decoupage paper or tissue paper. You could even use decorative napkins
- Mod Podge
Step 1
Once you have the wood you need cut to size, you will put the walls of your box shelf together. Sand the pieces before you put them together. When you are finished sanding, spray a little water on it and wipe down with a paper towel or rag to get the dust off.
Put a little wood glue on the ends, then put together corner by corner using the nail gun.
Step 2
Once the walls of your box shelf are up, you can put up the shelves for the inside of your box shelf. (See supply picture for example)

Step 3
Once your box shelf is put together you can decorate it any way you’d like! I used my homemade stain for the outside and I decoupaged the inside with newspaper.
Step 4
Measure & attach the frame to the front.

I used wood glue around the edges the shelf. Then put the frame on and nailed it from the front.
I touched up where the nails are on the frame with paint and mod podge to seal.
That’s it. It sounds like more work than it really is. As always, feel free to email me with any questions .


Leave a comment